Building
A
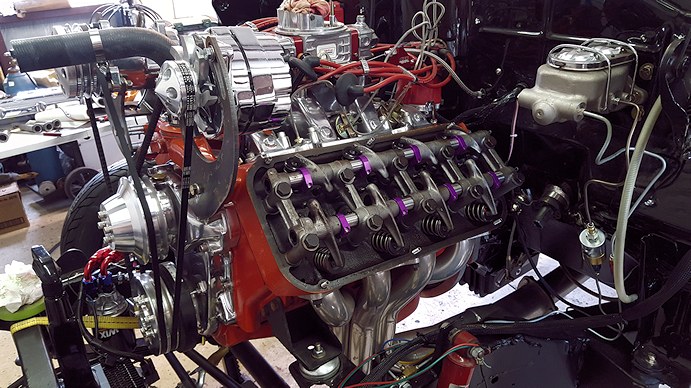
Chrysler Hemi Powered
1953 Plymouth Coupe
11-27-2018
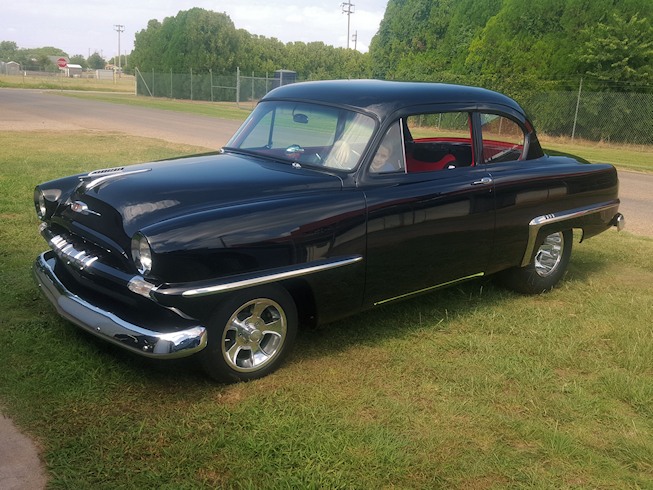
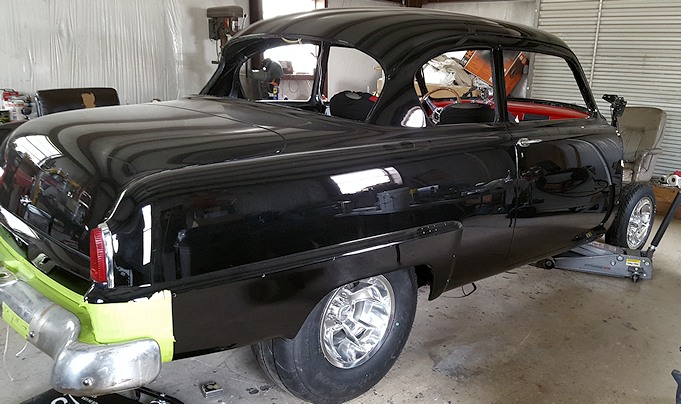
A
Old Style Gasser / Street Machine with Straight Front Axle
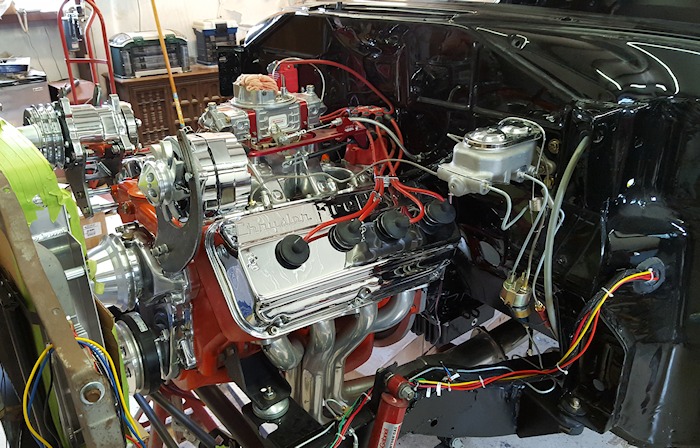
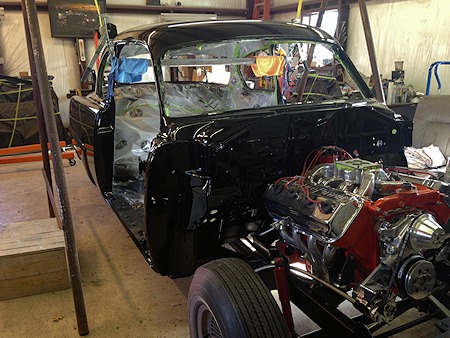
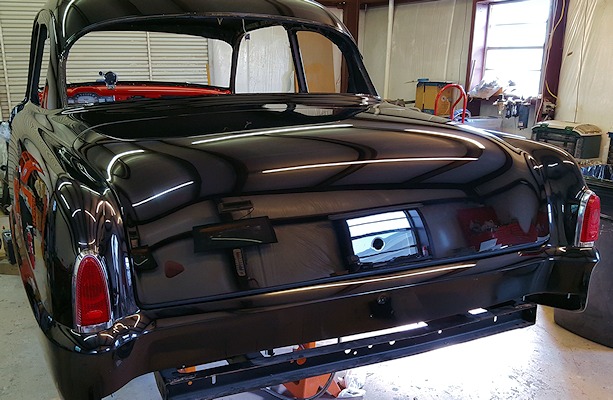
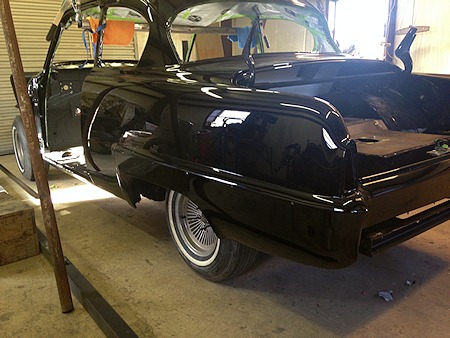
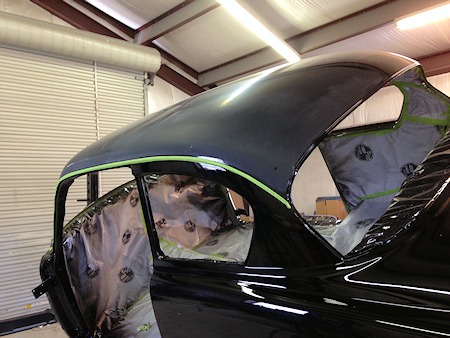
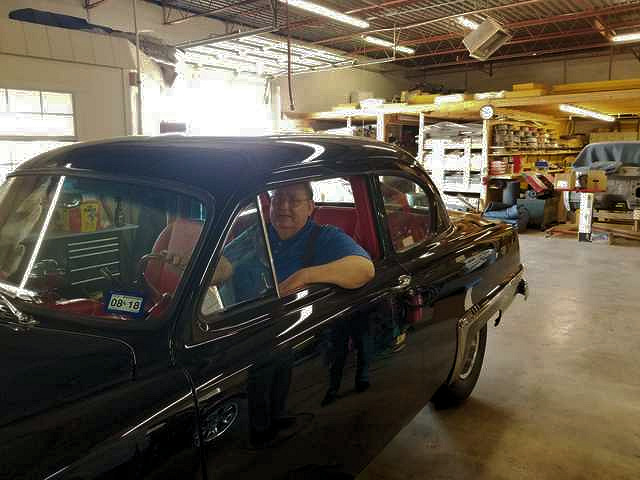 And it is finished |
|
7-2018
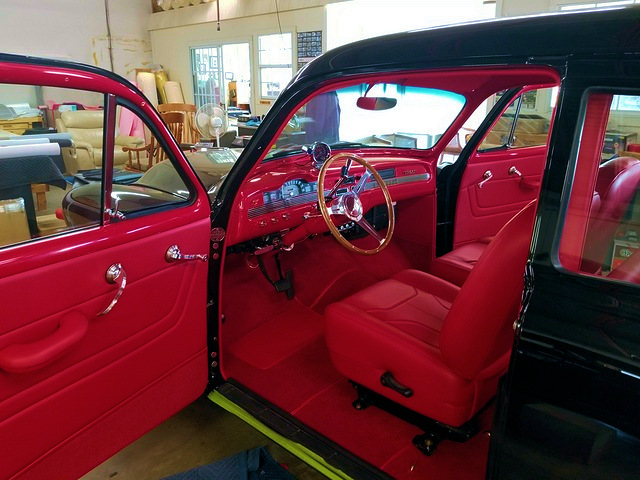
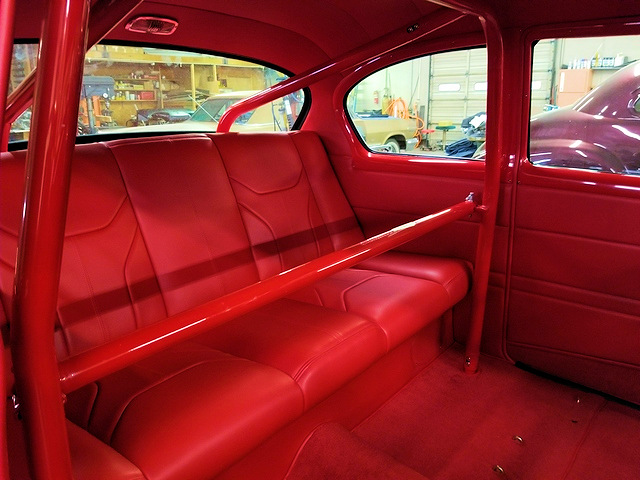
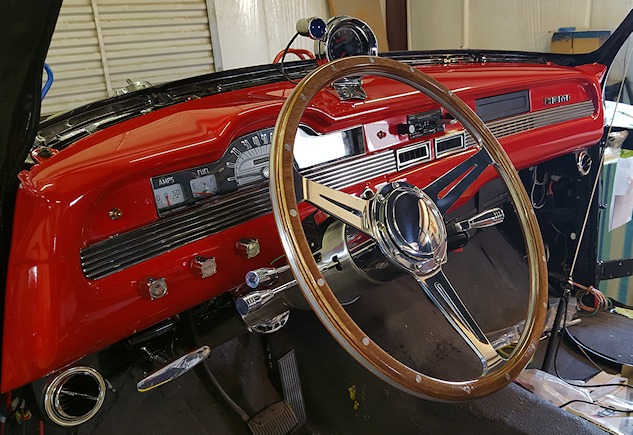
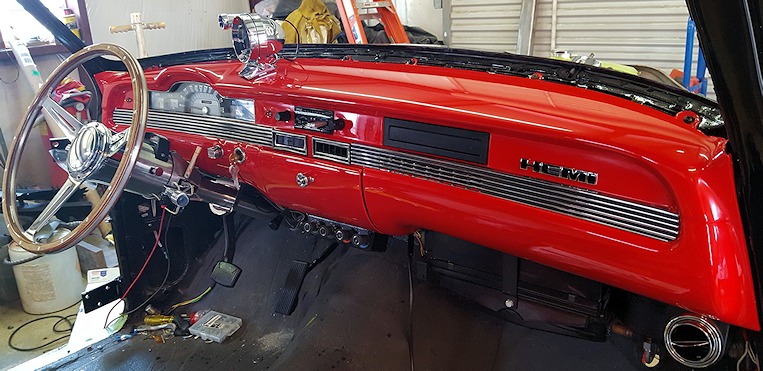
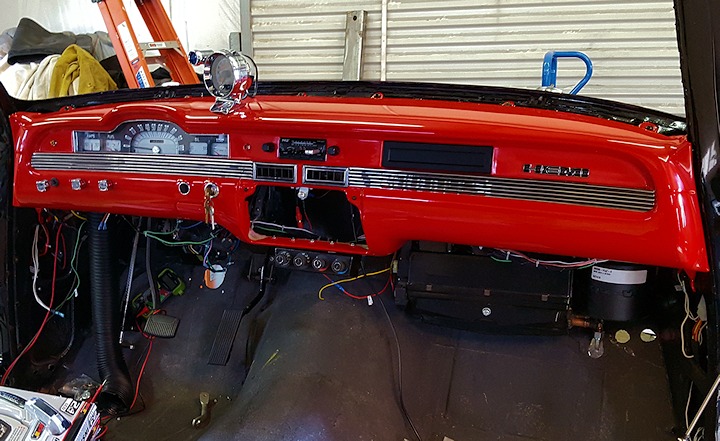
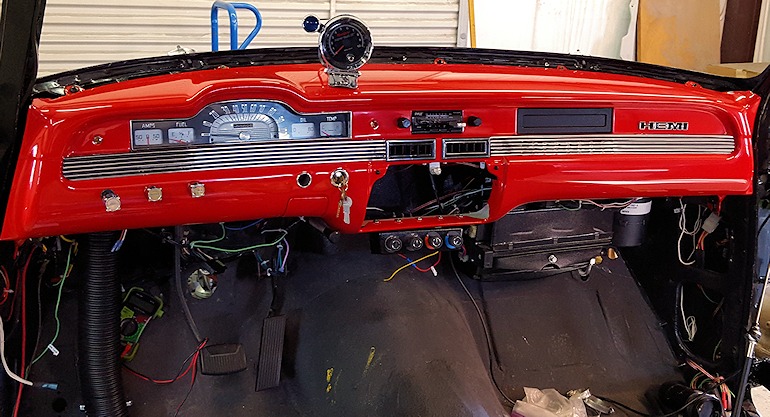
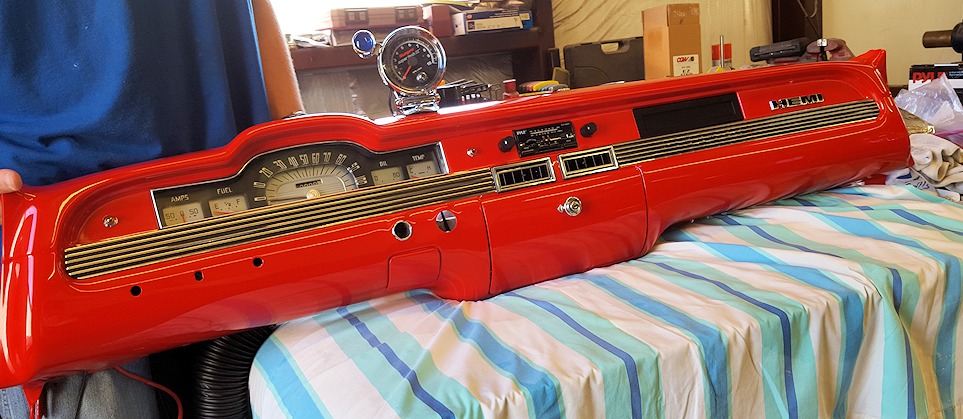
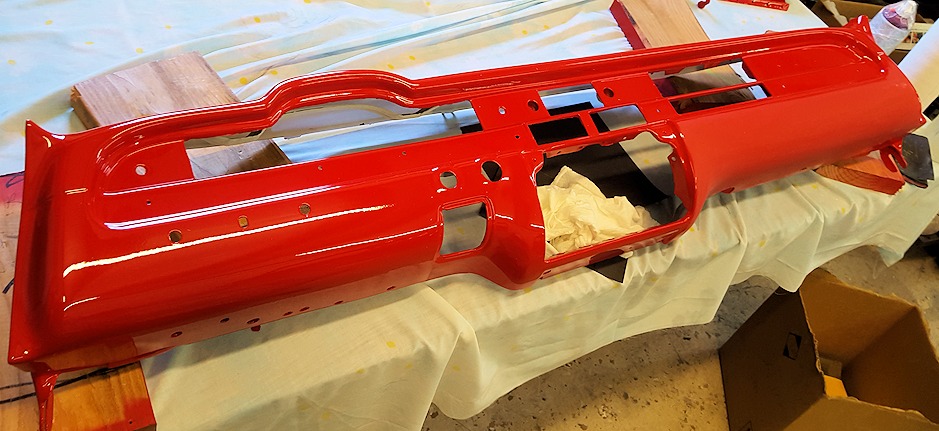
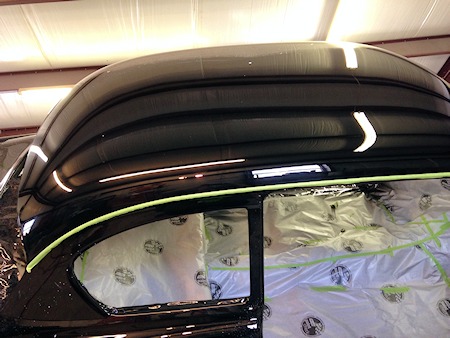
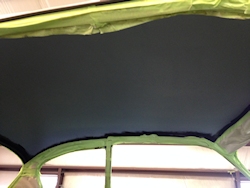
Interior
Finished
 |
 |
 |
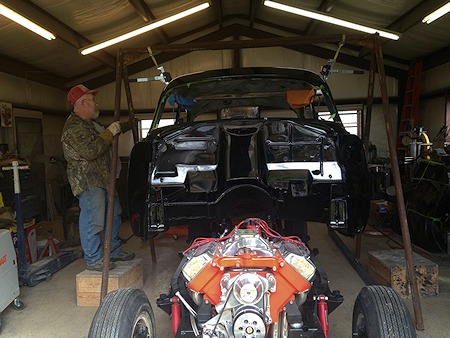
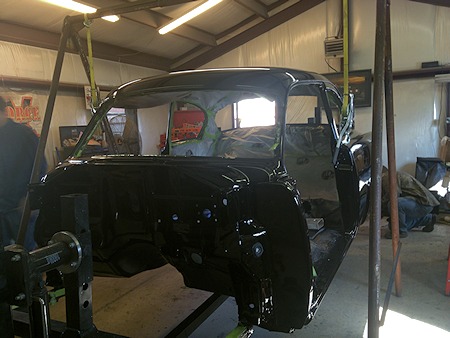
UPDATE 8-9-2017
Click
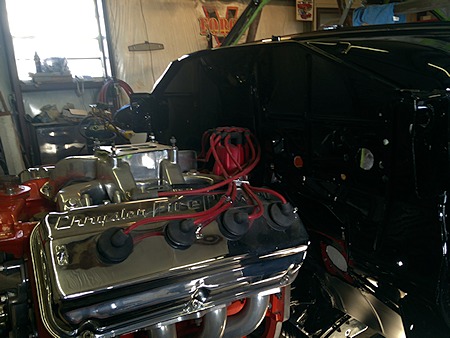
on image below for a YouTube walk around car video. Fireing and running the
Hemi and
a walk around the car just before the new glass and re-chromed bumpers.
https://www.youtube.com/watch?v=mVpLqtqKpbY
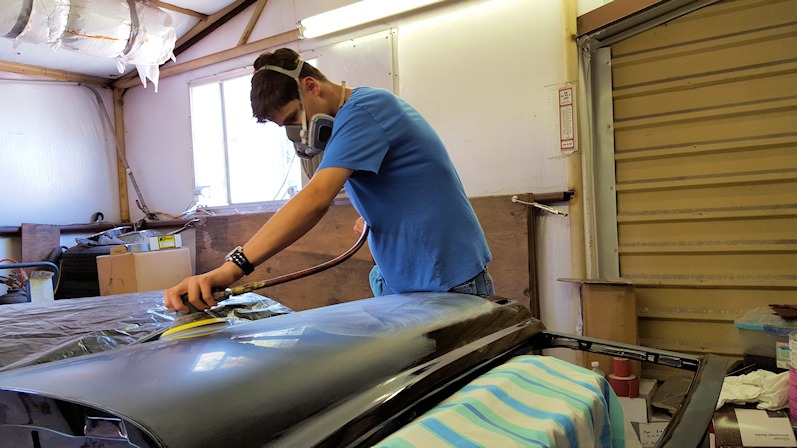
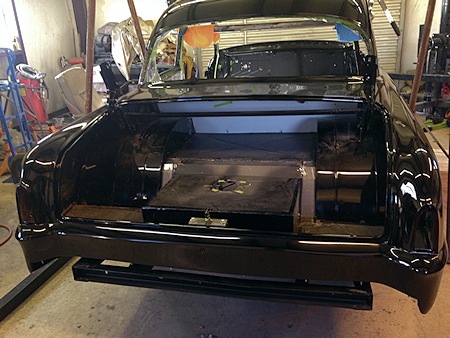
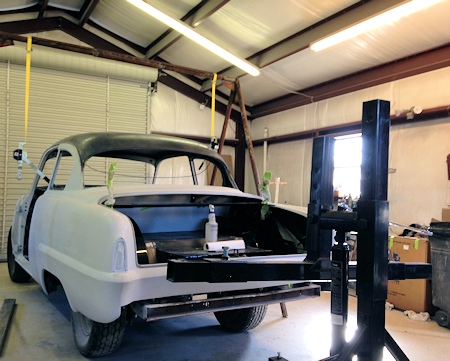
We are down to the wiper arms and Interior. Back glass will be installed when
the interior is completed.
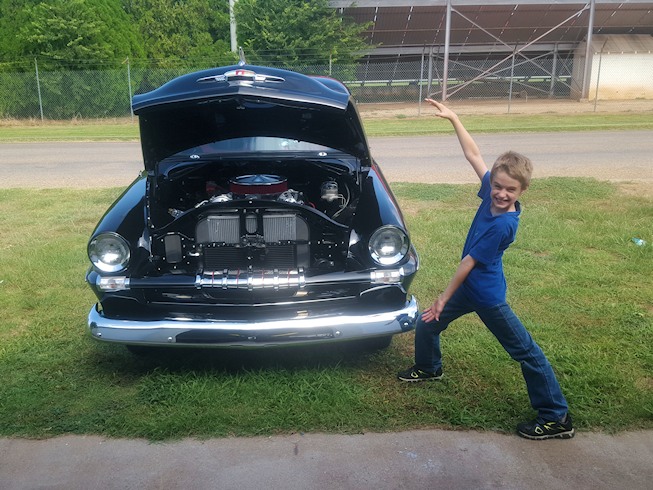
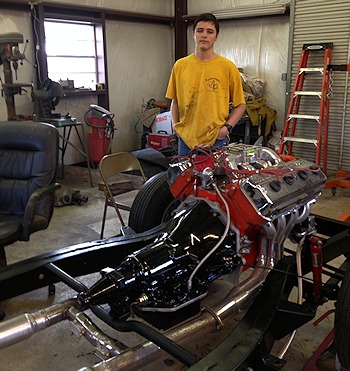
Grandson Charles loves
old cars and hot rods.
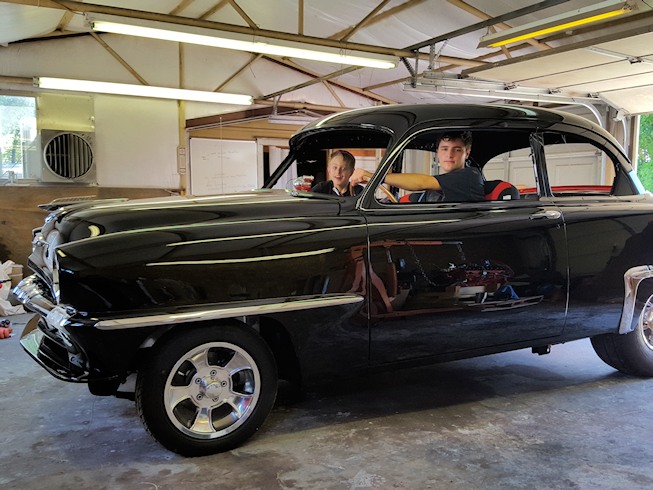
Grandsons
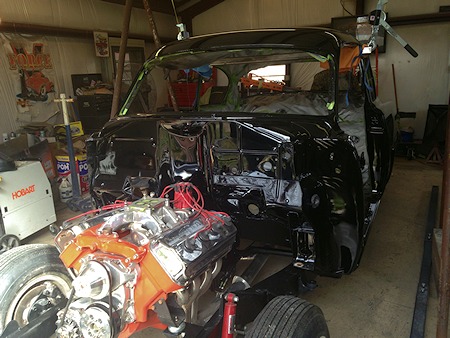
Paul first time to fire up the Hemi and drive it into the garage from the
driveway>
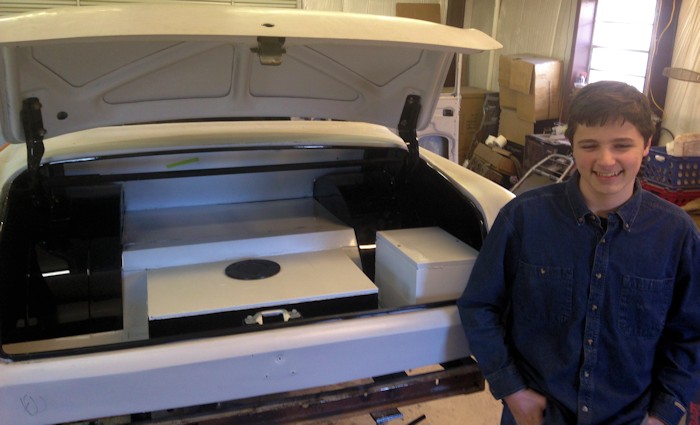
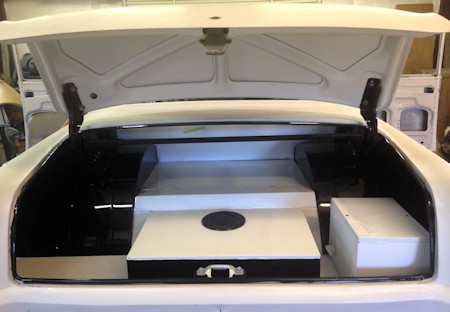
Grandson Charles is supervising. Ready for the Glass Shop, Bolting on the
Bumpers and
the anterior.
UPDATE 4 -2017
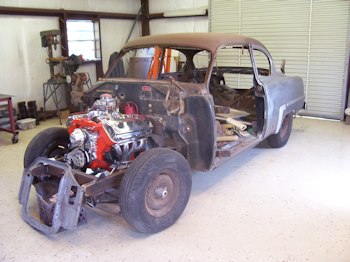
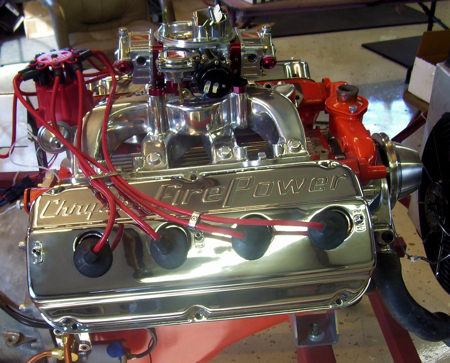
Getting Hemi out of Mothballs. A checked out and scoped. No rust has set up.
4-20-2017.
New Rocket Injector Raching Wheels and MT / SS Drag Radials. Fittne rear bumper.
Time to send it to chrome shop.
MT Front Runners.
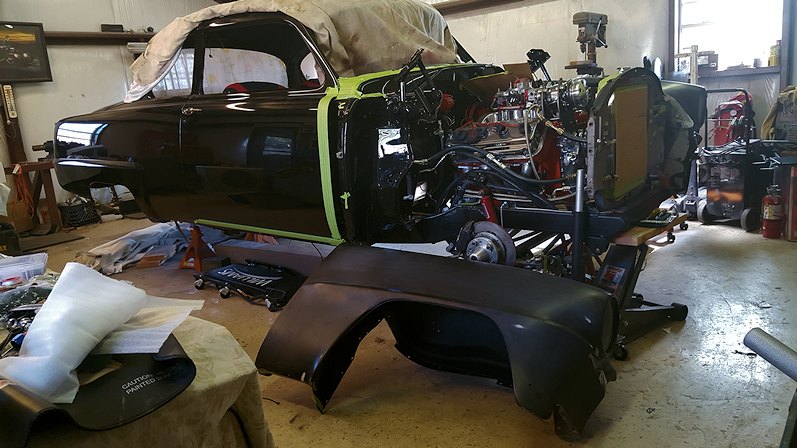
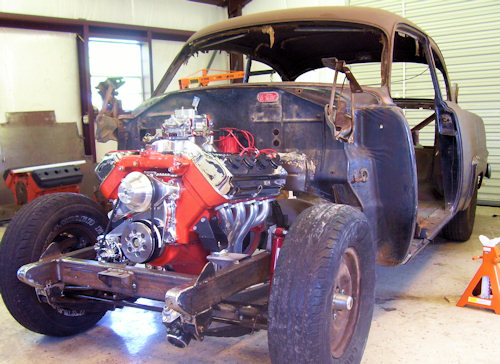
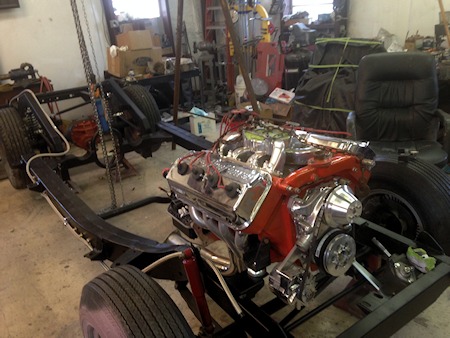
Front Clip is painted and polished since this Photo. Looks like we are getting
very close to a complete body bolted together.
August
27, 2016 update start.
More Current Update Photos Below.

Updates Auguast 27, 2016
end
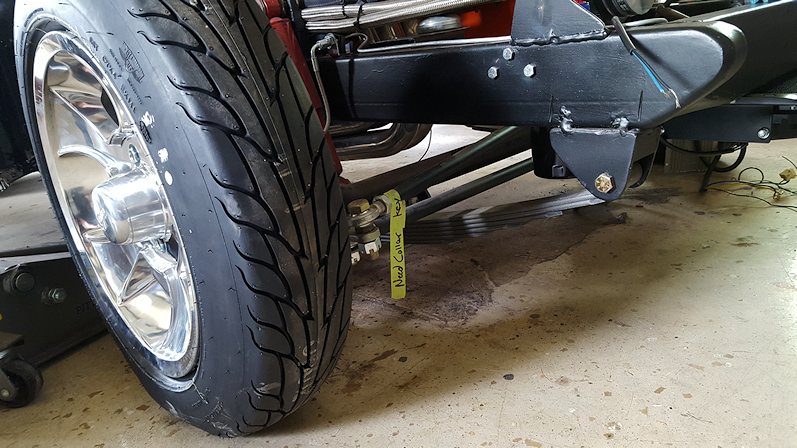
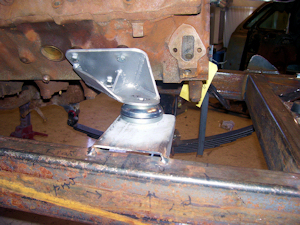
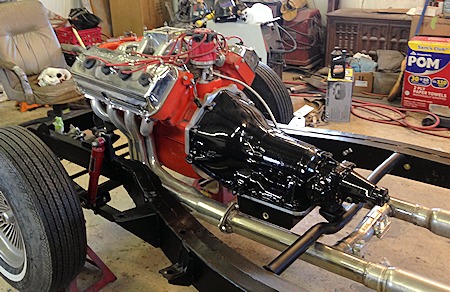
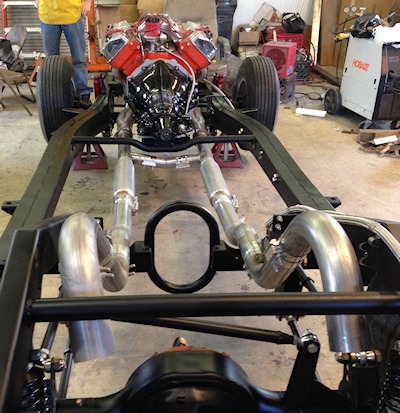
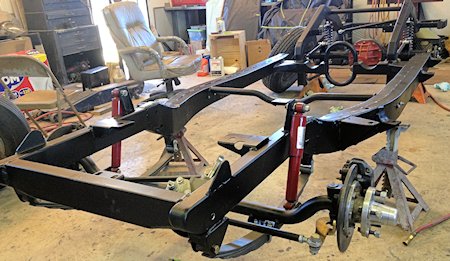
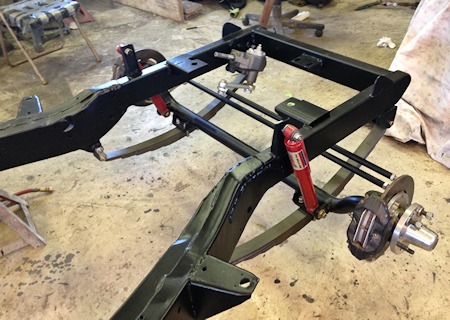
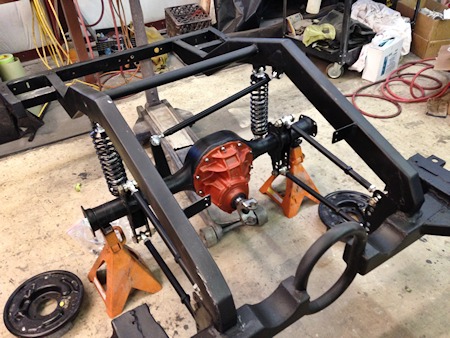
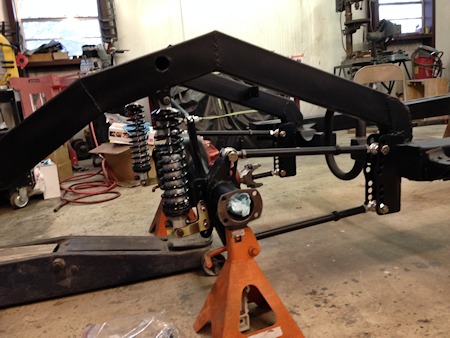
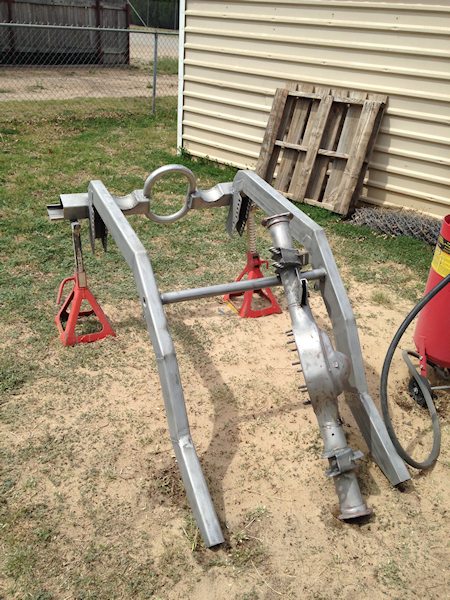
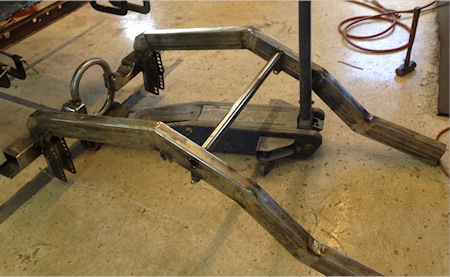
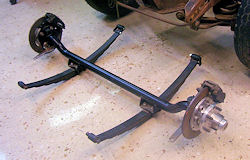 Light weight front axle with Wilwood spindles and disk breaks. Found and purchased off of racingjunk.com. It had been on a old race car for a long time but all is still new and never run. The race car was never completed. |
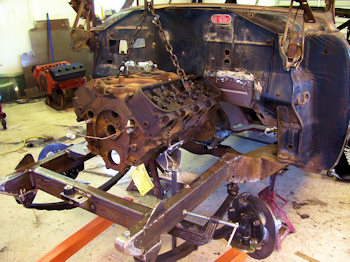
Front Half now built and ready for detailing. I also mocked up and built mounts
for a
Big Block Chevy, just in case I decide to some serious racing again some day.
These
old Hemi's just cost too much to beat on for my pocket book. I would like
to
see if the Hemi ETs the projected high 11s at a good 1/4 mile drag strip though.
 Big Block Chevy Mounts vs. Hemi in the photo above. Who knows we might want to go racing again some day. Both in same car. |
 |
Big Block Chevy Mocked up and front mounts built. Since I'm running a GM
TH 350 transmission I only
needed one rear mount and driveshaft A early Hemi is two inches shorter than
a BB Chevy. But with the Hemi to
TH 350 adapter that adds about a inch to the Hemi length and when you add
in the BB Chevy Short Water
Pump to Hemi water pump adapters to the Hemi both engines are within 1/2"
of each other in length from
where the TH 350 bolts up and the end of the "short" Big Block water
pump snout. So just pull one out and put
the other engine in with this setup. Change headers and maybe a radiator hose
on top.
I found this rubber seals and body gaskets websites that have 53-54 Plymouth
parts
CLESTERS in NC clestersauto.com/default.aspx
Steele Rubber Products www.steelerubber.com/?section=9
|
8-27-2016
8-21-2016 8-10-2016
Update
Started
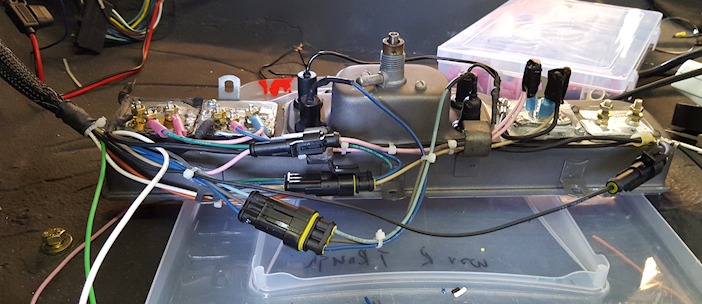
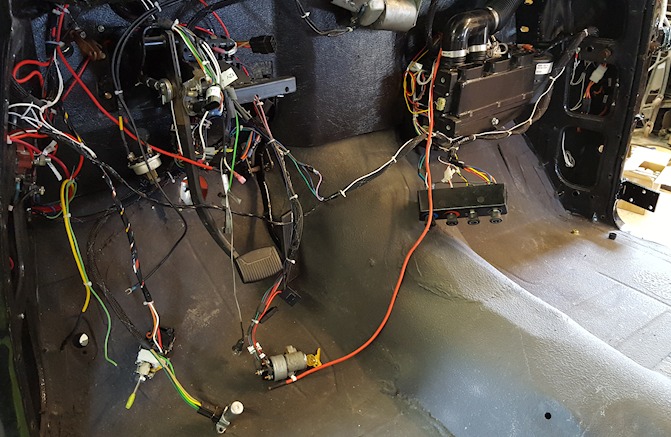
Wiring This Week; A barrel of Snakes so far :)
1-09-2016 updates
Back
Half paint and assembly |


|
Goal
by end of December 2015 was to have the body by itself painted and polished
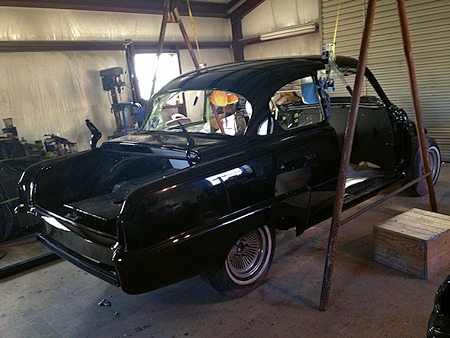
and ready to marry back to the frame and running gear. Goal met on time thanks to some great friends like Johnny Hurt.
|
--------------------------------------------------------------------------------------------------
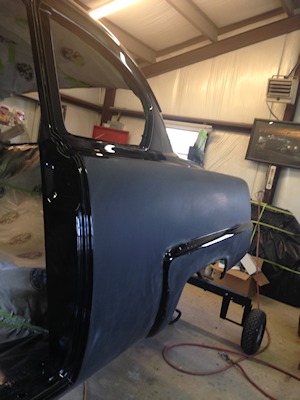
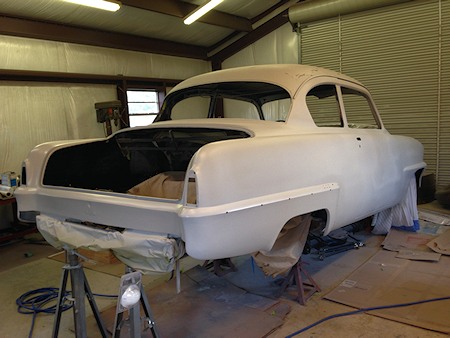
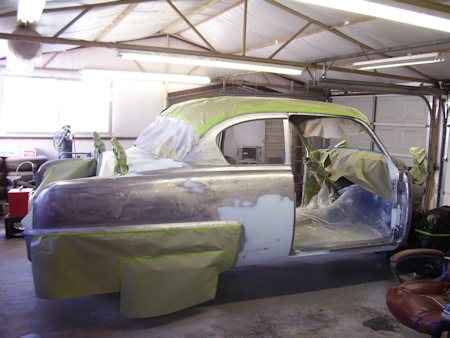
We
are down to the final sanding for the body.
We
are using Black primer because the final color will
be black and we're also checking the straightiness of the body.
10-29-2015
I have never had primer go on this smooth before. I had a cool morning and
everything must to have been perfect to shoot it this morning. And no Runs
either.
This will also check for any straighness issues in the body.
Finally we are starting to see some light at the end of the tunnel from all
the
hard body work this past year.

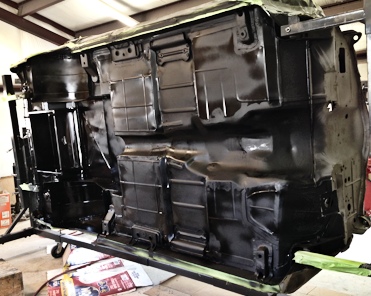
Body
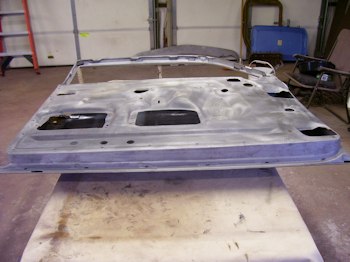
Is Blocked Straight and now we are starting to:
Detail the Bottom on the Rotisserie
9-26-2015
First
Coat of Primer is still wet. Next sanding and more primer
for a smooth surface to apply the bottom paint. The Firewall will also
be slicked down. Bottom looks a little rough on first coat, but will improve.
All the
new floor pans installed, welds blended in, fresh clean surfaces,
now ready for the first coat of Primer.
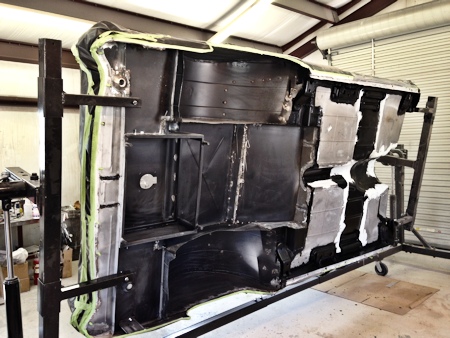
The Only Way To Go...
1953 Plymouth
body mounted on the Rotisserie, wrapped in plastic, the
bottom has been sand blasted clean. All in preparation to start detailing
the bottom.
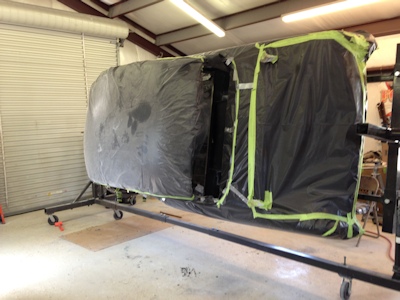
1953 Plymouth
blocked straight and staged to be mounted on the Rotisserie.
Setting
Up Back Half of the Plymouth
(I chose a narrowed rear-end and new back half frame and 4-link
suspension)
.........Next .........
We have roughed in the body and it is ready for blocking on the back quarters.
We have the 38" wheel tubs nearly
ready to install. We just painted and clear coated the walls of th
 Paul didn't think we would ever get finished with the back half build or it would look so good. |
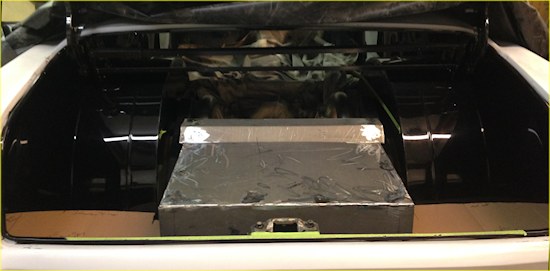
 See image to the right: What the new aluminum under the protective covering on the floor pan and Taylor battery box looks like. The gray primer on the car just looks white under the florescent lights. |
 |
 |
 Aluminum floor pans and battery box are covered with white protective plastic which will be removed after car is finished. |
|
|
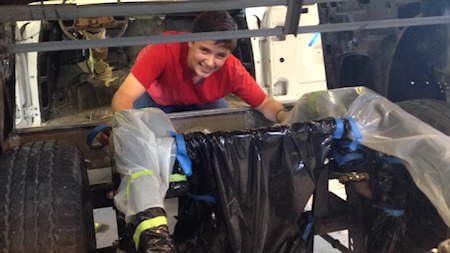
 Paul is finishing up back half by connecting original floor pan to new back half floor pans. |
 The Wheel Tubs really turned out nice. Much care needed not to scratch them. |
|
|
|
|
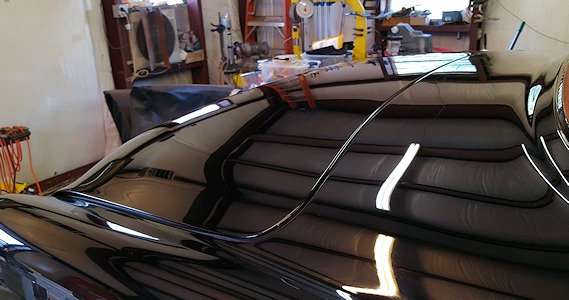
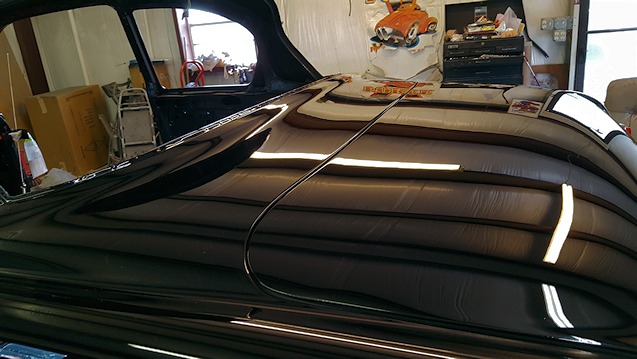
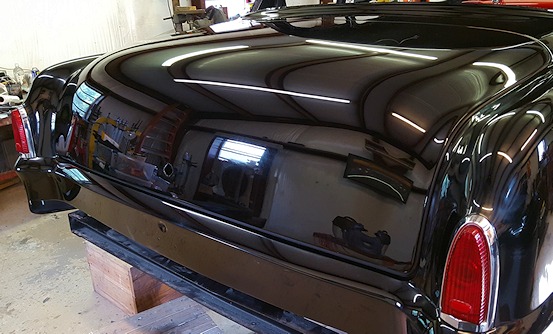
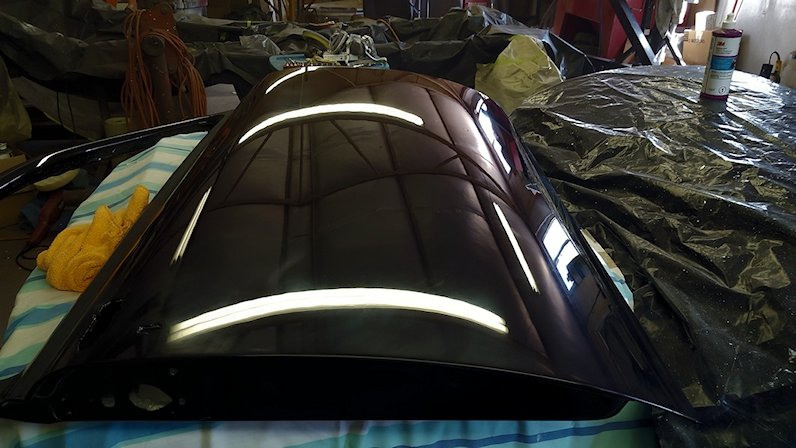
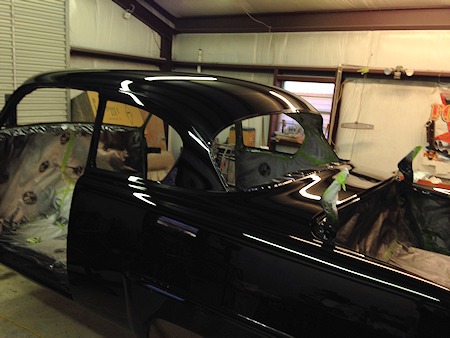
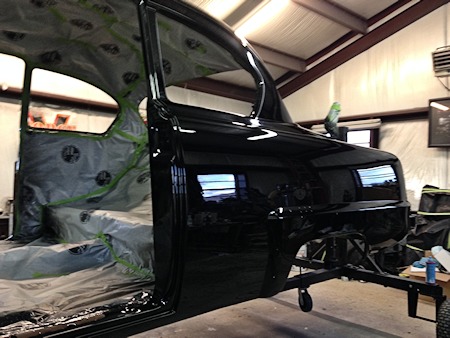
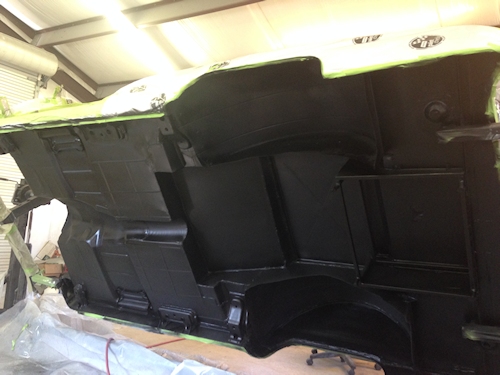
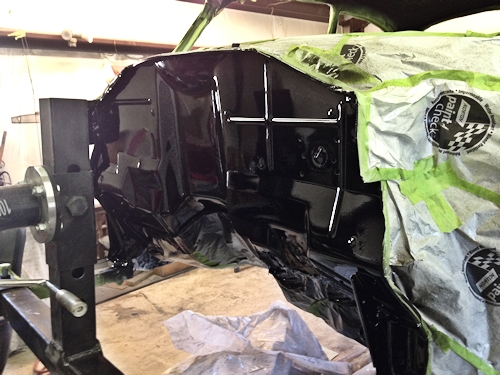
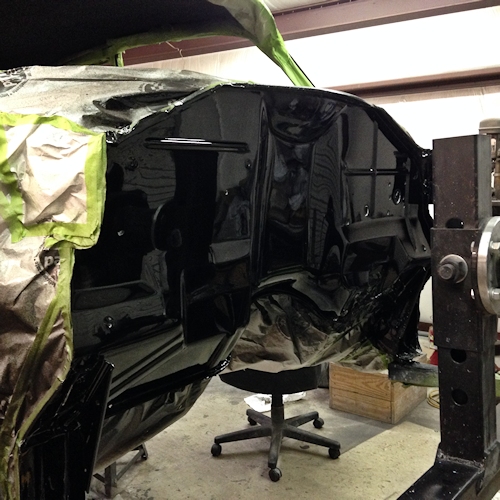
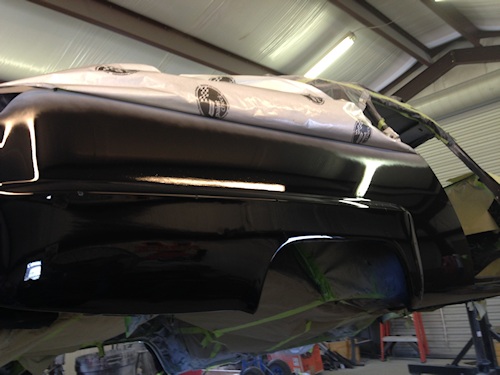
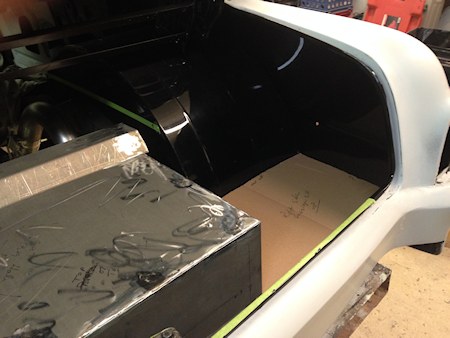
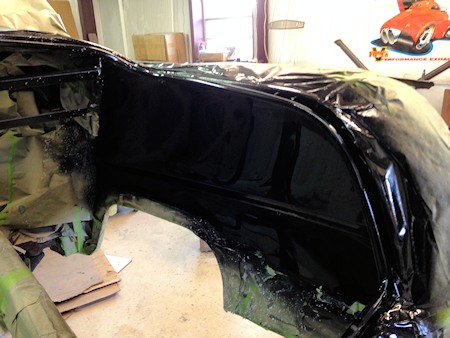
After the Spies Hecker Clear Coats has been Shot. Below is a photo
showing the mirror finish in a close-up shot. |
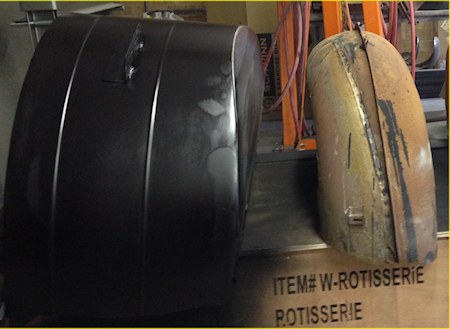
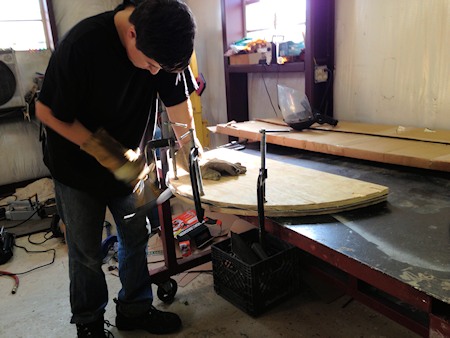 We made the wheel tubs last summer. We bought a 38" rear tube kit. We needed a full trunk pan put back with the integrity of a stock pan so we can put the car on at Rotisserie to do the bottom of the car. So we had to make one of our half circle sides ourselves. We started the edge by breaking the sheet metal with Dagger Tools "Tilting Wheel" and then we cut two haves in 3/4" Plywood to sandwich the sheet metal and then hammered the rolled lip into shape. Grandson Paul McDaniel working the lip with a body hammer. The tilting wheel was used with the Harbor Firelight Bead Roller. The Tilting Wheel is one of the most valuable metal working tools we have purchased. Without it we would have lost a clean edge around the edge of the wheel tub. |
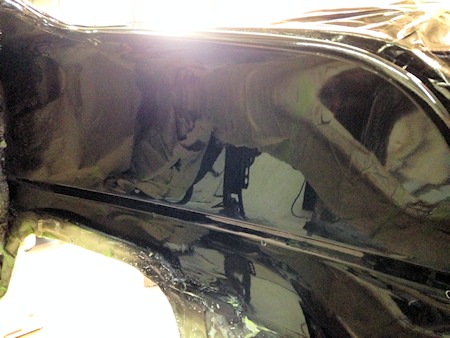 What you are looking at is the Clear Coat Mirror Finish. You see the reflection of the masking papered frame rails on the trunk inside wall. The 38" rear wheel tubs will be installed next then the the trunk floors. |
 The Spies Hecker "Blue Black" base coat has been applied and the clear coat is next. Spies Hecker "Blue Black" is the Blackest Black you can buy. |
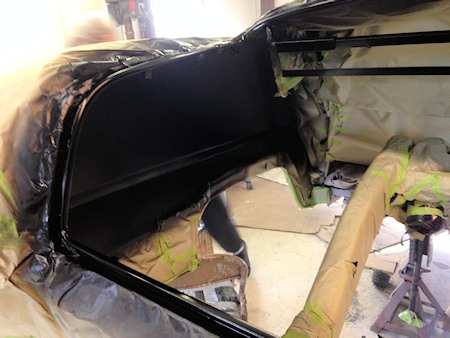
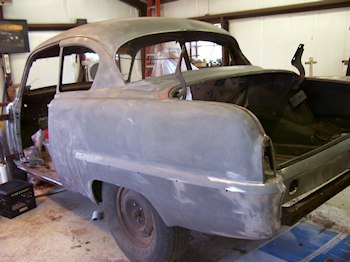
 Roughed in and ready for blocking. 11-03-2014 |
 Working on the inside of the trunk. Gettin gthe large wheel tubs painted and welded in is next. |
|
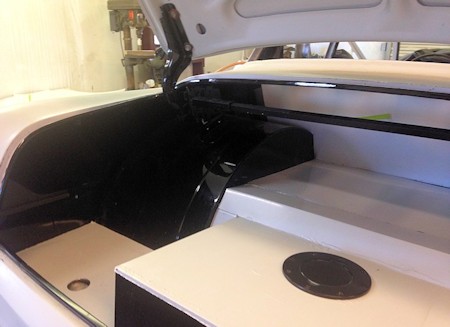
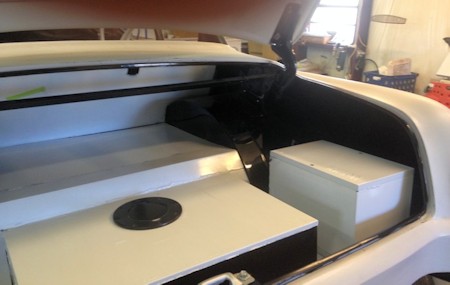
|
 Routing the 3 inch exhaust system was a challenge. But it all cleared once set up. No room to spare. Welded in brace at the top of the photo is a brace to hold the trunk hinges in place during fabrication. July 2014 |
 Finally getting the back-half welded in and installed. Once I have the car rolling again then I will remove all the old sheet metal left, sand blast and clean this part of the inside of the body trunk area, then install new wheel wells and make new trunk floor pans and fuel cell. |
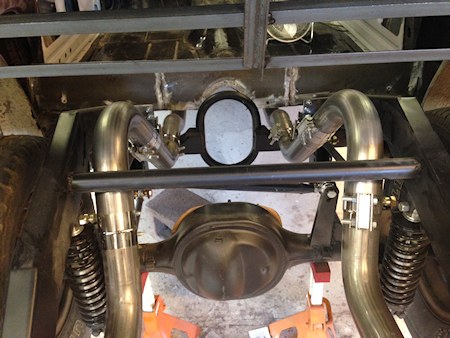
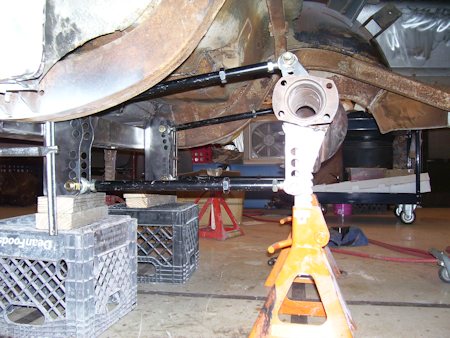
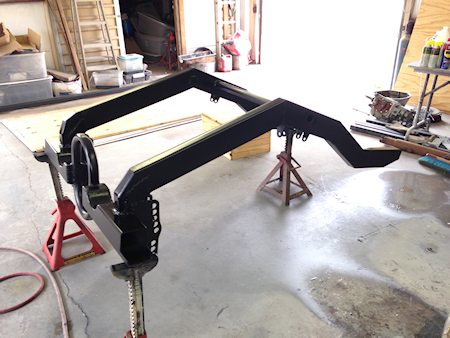
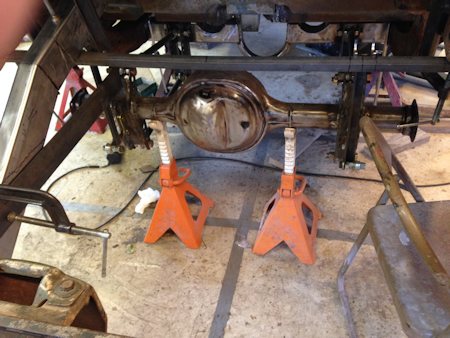
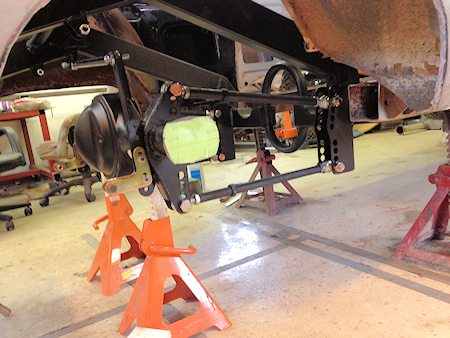 Side shot of the 4-link and 9" ford housing. Just about ready to weave the 3" FlowMaster exhaust system through this maze of closeness. It's going to be a tight fit! |
 |
Blasted and Primed and ready to weld into the Plymouth. |
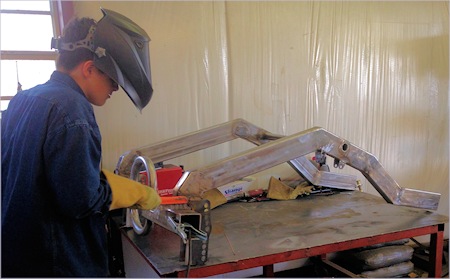 |
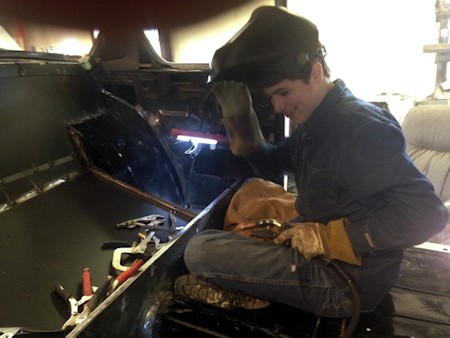
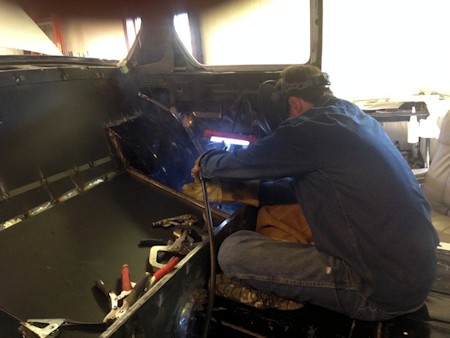
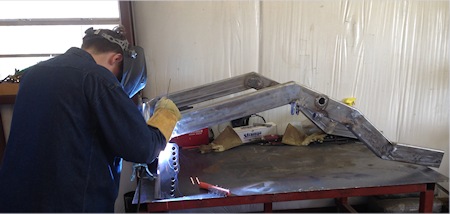 Paul Tig Welding the back half together. Nest step is to blast it and prime it then weld it into the Plymouth. Pre-bent rails would have been nice but they don't make kits for 1953 Plymouths. Besides old school is the best way for Paul to learn. |
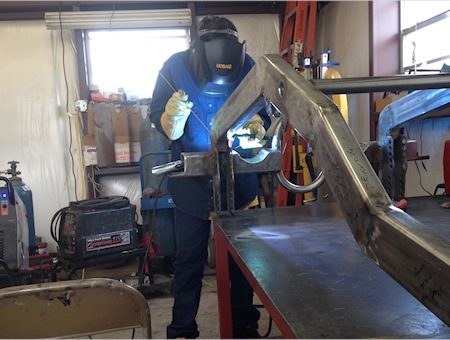 |
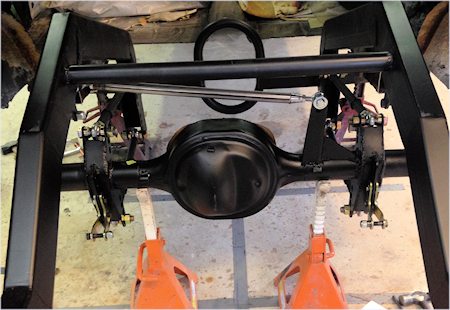
 Back half fitted to the Plymouth then tack- welded together. Removing from the car being very careful not to break off any of our tack-welds. A 4-link cradle for a 48" narrowed 9" ford rear end. This should take care of any horsepower we would make. |
 Teaching Grandson Paul McDaniel how a drag racing 4-link suspension works. With the frame true level the lower link is 0 - 3-degrees down to the front. This is very Important for control of car when a run is finished and letting off the gas. A 4-link can actually drive a car off the track or road on gas let-off at high speeds when set up wrong. |
 Cross member is welded together with drive shaft loop. Cross member is only installed with C-clamps until all the new rear frame rails are tacked together and removed to be welded up. Then the complete back-half frame assembly will be fully welded into the Plymouth at the front cross member to the frame and then at the rear frame crossover. |
|
|
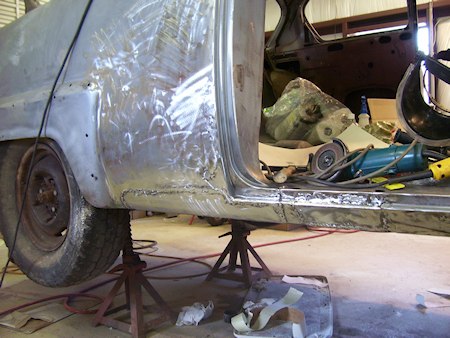
 Just starting to locate the 9" ford rear end. The tape and marks on the floor are from measuring all the original rearend locations with a plumb-bob and marking the locations on the floor for future references to center everything. Old frame rails will be removed when new frame is welded in. |
e
trunk with Spies Hecker "Blue-Black- and Clear Coat.
Since we want to put it on a rotisserie, to do the bottom, we have to build
the trunk pan back with the interrogatory
to support the body while on the rotisserie.
Body
Work Progress Report
 Rebuilt door hinges and now the door gaps are getting close. For the hinges I used dodge 11/32 pickup door bushings and Ford Pickup 11/32 door pins which I had to cut off and shortened. 12-30-2013. |
|
 |
 |
 Summer 2013 |
 Summer 2013 |
 Body work from patch panel and upper side scraps complete and ready for primer. Top is already primed Smoothing out factory door jams. Summer 2013 |
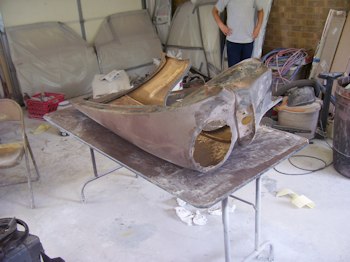
 Example of rot cut out and patch panels welded in, worst of two sides. Upper scrapes picked and filed allowing very thin layer of filler. Late 2012 and early and cold 2013 |
|
|
 Floor pans replaced. Blasted, welded, and coated with POR-15. Photo 2012 |

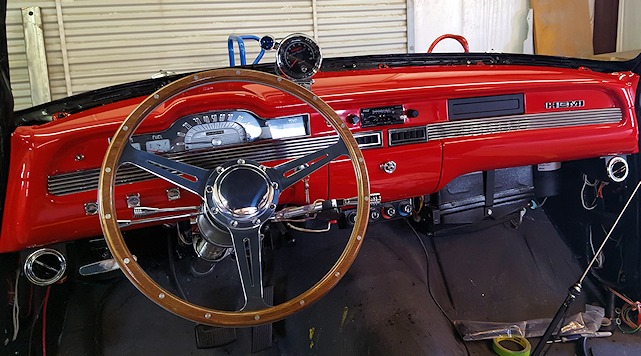
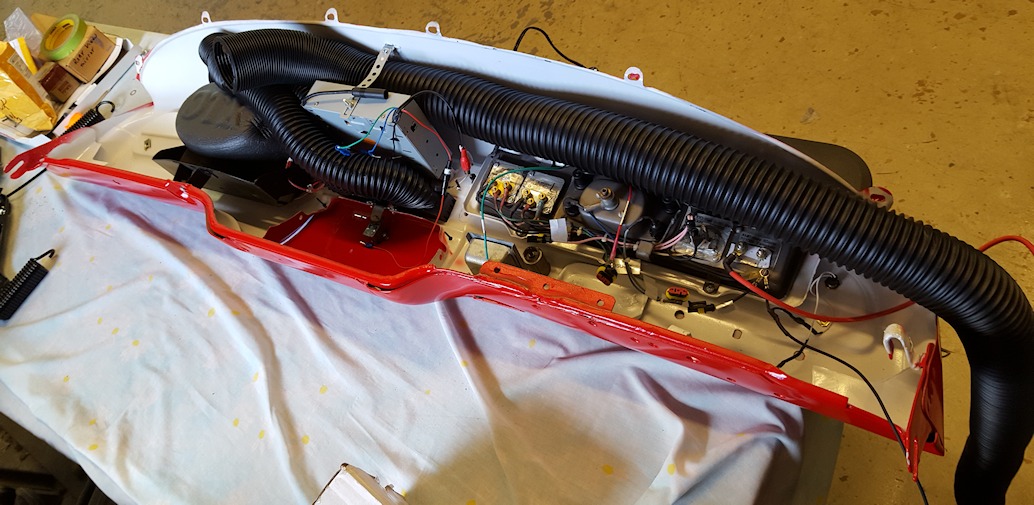
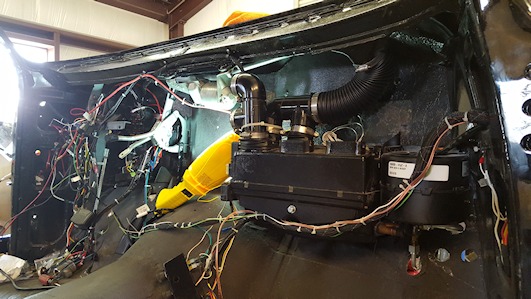
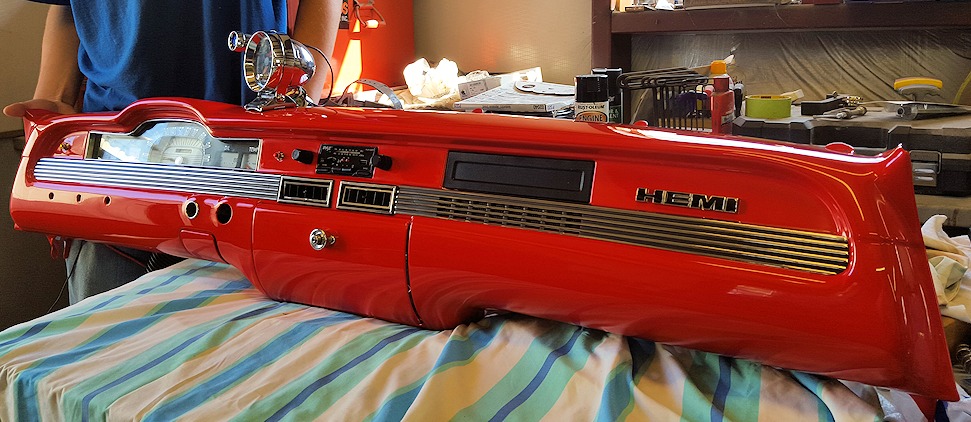
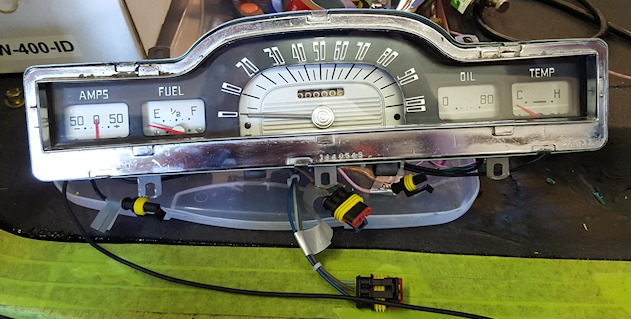
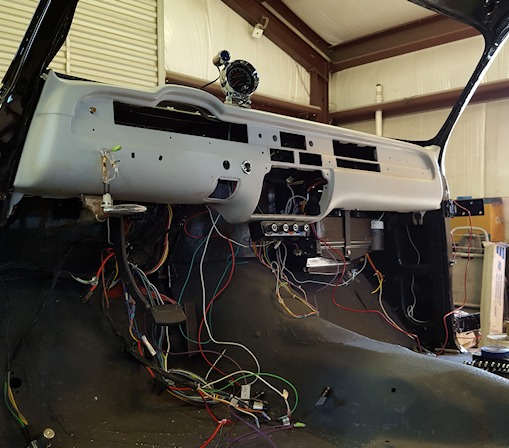
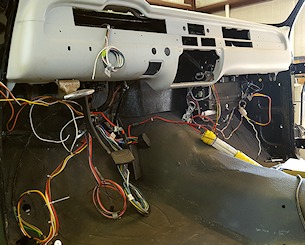
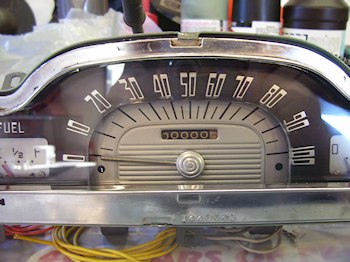
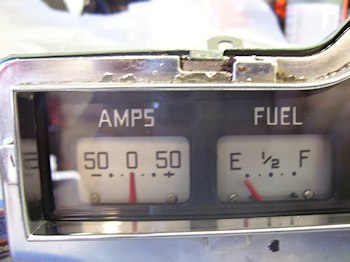
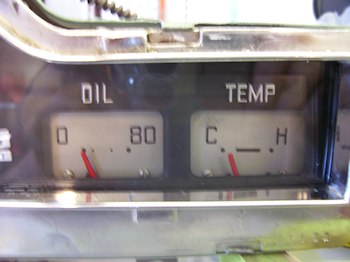
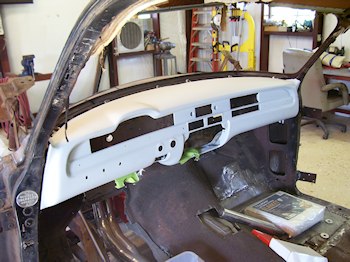
Restoring the Dash
 |
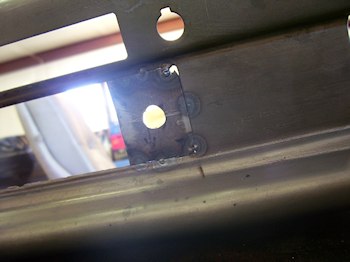
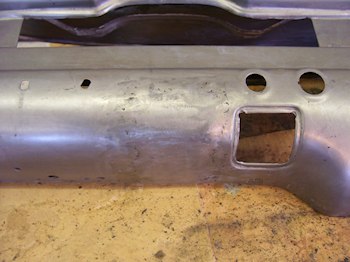 The old steering column notch had to be removed for the new after market steering column with automatic 3 speed shifter built into it. A 53/54 Plymouth and a 66 Chevy II use the same part number for Speedometer cable. No kidding!! |
 |
 |
 |
 |
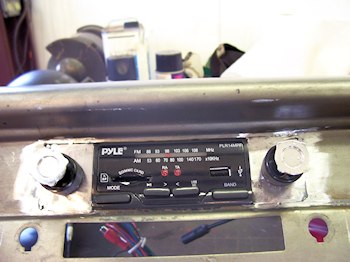 It takes a very small radio to clear the wiper motor if the radio is located here. I had to trim the wiper bracket, and it almost wasn't enough. A very very small radio. I ended up putting 2 after market rectangular dash air conditioner ducks below the radio with some modification.. |
 |
Doors
 |
 |
 |
 |
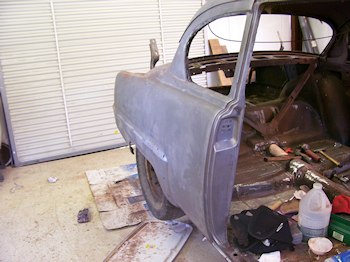
There was not any rust out in the bottom of the doors.
 |
Doors with Wet Primer and when
dry are ready for 80 grit LONG BLOCKING. Note: They were 80 grit long blocked three times and 220 long blocked twice before final 400 grit sanding for painting. No photo of final blocking, My camera was down for months. |
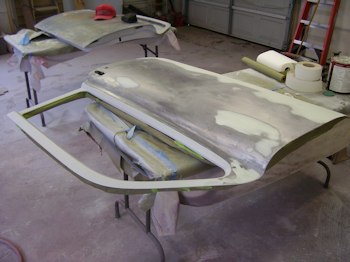
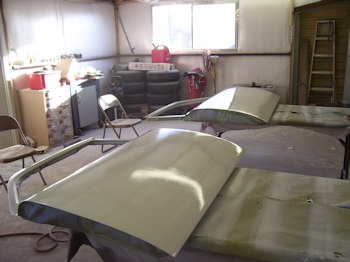
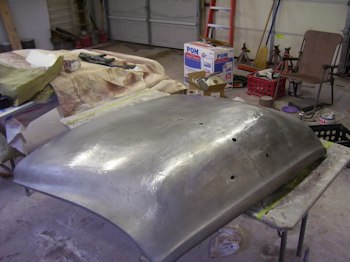
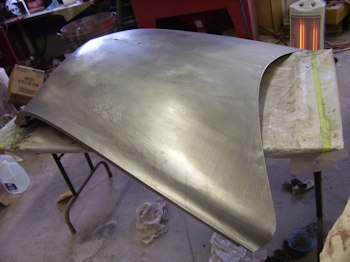
Hood
 |
Left: The front of the hood had to be
picked and filed. Someone whipped the front of the hood with a small
chain making allot of small dents. Someone had shaved the hood and the
holes had to be opened and repaired.
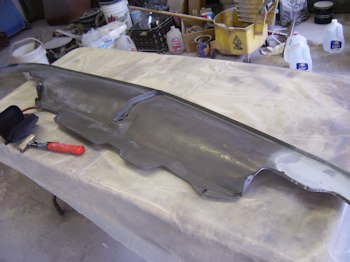
The bottom of the hood was worked just as much as the top side. The bottom of the hood will look as good as the outside of the body. It was block sanded just like the body parts are. Sorry no photos of hood in primer Picture below: for the bottom side of the hood. It looks like a large dent but that is just light playing tricks with the camera, there was only a small dent there, see the photo on the below left after the small dent was picked and filed.. |
 |
 |
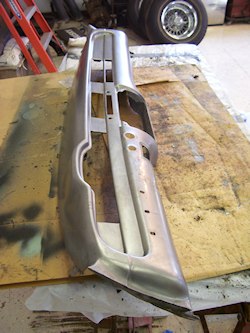
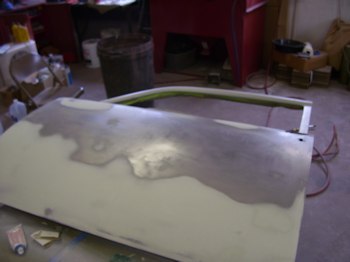
Front Fenders
 What the Front Fenders looked like before they were cleaned and surface rust removed. |
 Rust Removed but still much work to do. |
 |
Cleaned up on both sides is the drivers side fender.
I welded the seam that is on the 53/54 Plymouth front fenders. I think it looks better with the seam smoothed over but it means more work working out the small amount of warpage you will get even if you are very careful with a low amperage wire welder and take your time. |
 |
After welding the seam I filled the imperfections
with lead to keep moister from getting through from the back side.
|
Body
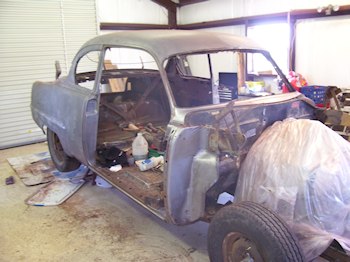 |
 |
 |
 |
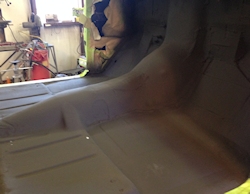
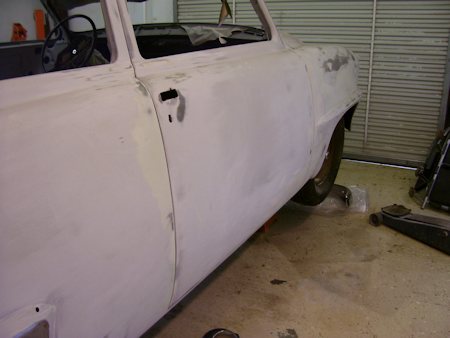
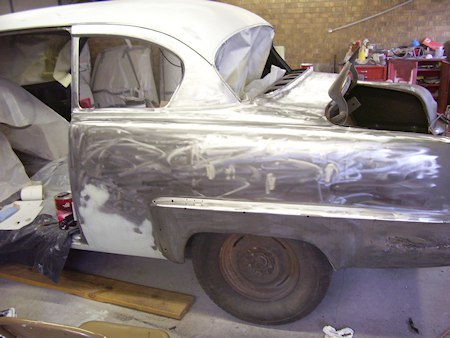
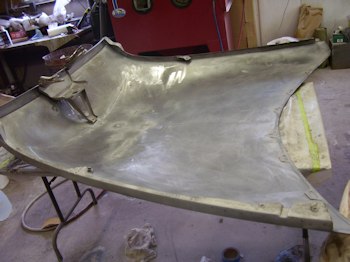
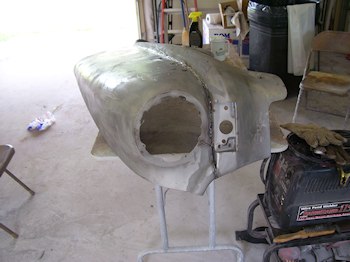
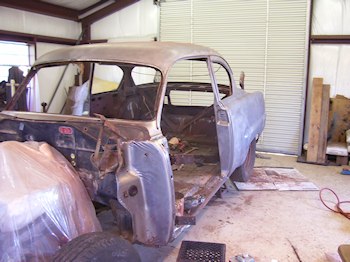
The cleaning of the body has began. Floor Pans are still in progress and the body turned out to be surprisingly straight
with no sign of damage from a accident or panels replaced. Rust at the bottom of the 1/4's at the fronts, right
behind the doors. Some rust to be cut out and replaced in the rear pan and move the gas filler tube. The top is not
rusty, what you see is power generated by a DA sander that has settled on the top. Floor pans being rotted (rusted)
out is almost a given on these old Plymouths because most of them had cheap rubber floor mats that contained
the moister when water got on the floor boards. The inside will be blasted with a sand blaster at some point.
I will coat all the inside, floor pans, and in the bottom of the 1/4s with POR-15 to keep rust from forming again
as the car ages in the future. (6-12-2012)
Misc Photos
 |
 |
 |
The Parts that have already been worked, block sanded
and sanded to 400 grit and are ready for paint. I had a total left knee
replacement last year so I worked on these parts because they were the
easiest for me to handle. Sorry I didn't have any photos of the deck
lid. I took off the T-Handle and updated the 53 decked to a 54 Plymouth
lock and pushbutton type. It looks much better than the T-Handle did.
The deck lid was in very good shape except for a few small hail pecks
that I picked and filed.
It has taken allot of work to clean the surface rust off some of the parts but they cleaned up very good. I use "Rust - B - Gone' and some sand blasting. |
 Good solid door jams with no rot at the bottoms. |
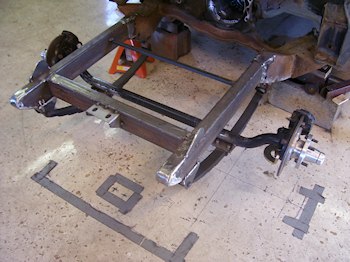 Lines on the floor are from a plumb-bob marking where all the original front suspension was before it was cut out. These reference marks were used to align and center new front frame and suspension. |
Big Block Chevy Motor
Mounts also fabricated.
Big Block Chevy Mounts vs. Hemi in the photo above. Who knows we might want to go racing again some day. Both in same car. |
|
Big Block Chevy Mocked up and front mounts built. Since I'm running a GM
TH 350 transmission I only
needed one rear mount and driveshaft A early Hemi is two inches shorter than
a BB Chevy. But with the Hemi to
TH 350 adapter that adds about a inch to the Hemi length and when you add
in the BB Chevy Short Water
Pump to Hemi water pump adapters to the Hemi both engines are within 1/2"
of each other in length from
where the TH 350 bolts up and the end of the "short" Big Block water
pump snout. So just pull one out and put
the other engine in with this setup. Change headers and maybe a radiator hose
on top.
Click
Here for '354' Hemi Build
Photos on Page 2